How To Remove Years of Grease and Grime From Your Oven – The Ultimate Deep Clean (Without Toxic Fumes!)

Let’s be honest:
Most ovens don’t stay clean for long.
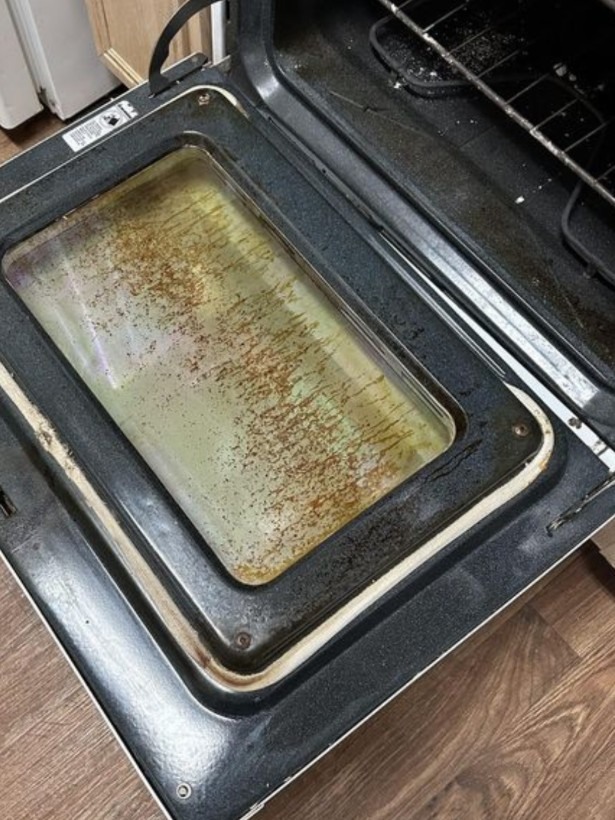
Between roasting, baking, and the occasional spill, layers of grease, burnt-on food, and carbonized gunk build up over time — turning your once-shiny oven into a science experiment.
And while many reach for harsh chemical cleaners that smell like a chemistry lab… there’s a better way.
You can restore your oven to like-new condition — using safe, effective methods that actually work.
Whether you prefer natural ingredients or trusted store-bought powerhouses, here’s how to tackle even the worst oven buildup — safely and efficiently.
🧼 3 Proven Methods to Deep-Clean Your Oven
✅ Method 1: Baking Soda & Vinegar (Natural, Non-Toxic Powerhouse)
This eco-friendly duo cuts through grease without fumes or gloves — just elbow grease and patience.
🛠️ What You Need:
½ cup baking soda
2–3 tbsp water
Spray bottle with white vinegar
Soft scrub brush or sponge
Damp microfiber cloth
👩‍🍳 Step-by-Step Instructions
1️⃣ Make the Paste

 Make the Paste

Mix baking soda + water into a thick paste (like toothpaste).

Add more water if too dry; more soda if too runny.

2️⃣ Apply to Interior Surfaces

Remove oven racks.

Spread paste on all interior surfaces — sides, bottom, top, door (avoid heating elements!).

Avoid vents and fan areas in convection ovens.

3️⃣ Let It Sit Overnight (Best Results)

Leave for 8–12 hours — the longer, the better.

For light cleaning: 2–4 hours works too.

4️⃣ Spray with Vinegar & Scrub

Spray white vinegar over the dried paste — it will fizz and loosen grime.

Use a soft brush or sponge to gently scrub away residue.

Focus on tough spots: corners, under racks, around seals.

5️⃣ Wipe Clean

Continued on the next page

Read more

Fake honey is invading the market: how can you recognize real honey?

In recent years, counterfeit honey has appeared on the European market, and the data is alarming. A recent inspection conducted by the Active Consumers association revealed that 5 out of 10 honey brands tested did not meet basic quality standards. These include:

Water content: Must be less than 20%
Electrical conductivity: Must not exceed 0.8 mS/cm
Hydroxymethylfurfural (HMF): No more than 40 mg/kg
Diastatic activity: At least 8 Göte units
Proline content: No less than 180 mg/kg
Fake honey is flooding the market: how to recognize the authentic one
How is honey counterfeited?
There are two common methods of adulterating honey:

Dilution with glucose-fructose syrup: Increases volume and reduces production costs.
Premature harvest: Removing honey from the hive too early speeds up production, but results in higher water content and lower quality.
In both cases, what ends up on store shelves does not meet the standards of natural honey.
Is it possible to spot counterfeit honey at home?
We searched the internet to discover the most common honey authenticity tests. Here are our results and their reliability:

🧻 1. Napkin test claim

Continued on the next page

Read more

4 Best Herbal Collagen Toners For Young & Beautiful Skin

Collagen makes up roughly 70 % of your dermis, but UV exposure, pollution, and natural aging unravel its triple-helix fibres, leading to slack skin, enlarged pores, and fine lines. Botanical antioxidants such as flavonoids in fenugreek, omega-3-rich chia mucilage, eugenol in clove, curcumin in turmeric, and the inositol in rice water can help curb the enzymes that break down collagen or encourage new collagen deposition—especially when delivered in a water-light, leave-on format like a toner.

1. Fenugreek Toner – Skin-Repair & Elasticity Boost

Ingredients Required

  • Fenugreek seeds – 1 tbsp (soaked overnight)
  • Strong green-tea infusion – ½ cup (cooled)
  • Rose water – ½ cup
  • Fresh aloe-vera juice (strained) – 1 tbsp
  • Vegetable glycerin – ½ tsp

Procedure

  1. Simmer the soaked fenugreek in ¾ cup water for 5 minutes; cool and strain.
  2. Blend the fenugreek tea with green tea, rose water, and aloe juice.
  3. Whisk in glycerin, then funnel into a sterilised 200 ml spray bottle. Refrigerate.

Instructions

  • After cleansing, mist generously over face and neck; pat until absorbed.
  • Use morning and night. Discontinue if any irritation develops.

Benefits

  • Stimulates fibroblasts for firmer, more elastic skin.
  • Green tea antioxidants help slow photo-aging.
  • Aloe vera supplies polysaccharides that further support collagen synthesis.
  • Rose water calms redness and balances pH, enhancing ingredient penetration.
  • Glycerin draws water into the surface layers for lasting softness.

2. Chia-Seed Toner – Deep, Weightless Hydration

Continued on the next page

Read more

Adoring the Retro Allure of Vintage Objects

History of Lincoln Logs
Invention and Introduction
Lincoln Logs, a cherished toy, were created by John Lloyd Wright in 1916. The son of architect Frank Lloyd Wright, John drew inspiration from log cabin designs he encountered during his travels. He crafted these interlocking wooden blocks to simulate log cabin construction.

Initially produced by Playthings Manufacturing Company, which later merged with Hasbro, Lincoln Logs gained popularity for their straightforward design and educational benefits. Children could build and recreate structures based on fundamental construction principles.

Usage of Lincoln Logs
Design and Function
Lincoln Logs are designed to encourage imaginative play and improve spatial reasoning. Each set features interlocking wooden logs in various sizes and shapes. Kids can construct a range of structures, including cabins, forts, and towers, fostering creativity and complex design skills.

In the early 20th century, these logs were widely used as educational tools in schools and homes. They helped children grasp basic engineering concepts and develop problem-solving, planning, and hand-eye coordination skills. Their simplicity made them accessible and fun for all ages.

Legacy of Lincoln Logs

Enduring Appeal

Continued on the next page

Read more

Mixing Garlic and Cloves: A Secret No One Ever Talks About

Vous avez dit :
Pan-fried meatloaf recipe: grandma’s trick for perfect results Pan-fried meatloaf is a simple and delicious main course, perfect for any occasion. Thanks to a grandmother’s trick, you’ll get tender and juicy meat without the need for an oven. Discover the step-by-step recipe and serve an irresistible meatloaf! Ingredients for 4 people 500g mixed minced meat (beef and pork) 2 slices of stale bread 100 ml of milk 1 egg 50 g grated Parmesan cheese 1 clove of garlic, minced Chopped fresh parsley to taste Salt and pepper to taste Nutmeg to taste 100 g of cooked ham (optional) 100g sliced ​​cheese (optional, such as scamorza or provola) Extra virgin olive oil to taste 1 glass of vegetable broth or water Grandma’s trick: cooking in a pan The secret to a tender and flavorful meatloaf is slow cooking with the lid on , which allows the meat to remain juicy without drying out. A little trick is to soak the bread in milk before mixing it with the meat, ensuring the perfect consistency. Preparation Prepare the mixture : In a bowl, soak the stale bread in milk for a few minutes. Squeeze it well and crumble it into the minced meat. Add the remaining ingredients : Combine the egg, Parmesan, garlic, parsley, nutmeg, salt, and pepper. Mix well until smooth. Shaping the meatloaf : If you like, stuff with ham and cheese, rolling the meat up to seal the filling well. Pan-Fry : Heat a drizzle of oil in a non-stick pan and brown the meatloaf on all sides until evenly browned. Slow cooking with a lid : Pour the vegetable stock into the pan, cover with a lid and cook over low heat for about 40-45 minutes , stirring gently halfway through cooking. Resting and serving : Let the meatloaf rest for a few minutes before slicing it and serving it piping hot. Tips for a perfect meatloaf For a more flavorful crust , you can deglaze with a little white wine before adding the broth. Add vegetables like carrots and onions to the pan for a richer cooking base. If you want a lighter version , use only turkey or chicken meat. Thanks to this grandmother’s trick, pan-fried meatloaf will be tender and delicious without the need for an oven. Perfect for a family lunch or a delicious dinner, this recipe is easy to make and will delight everyone at the table! Correct text
ChatGPT a dit :

Here’s a cleaned-up, corrected, and more fluent version of your text, keeping the original meaning and tone but improving grammar, flow, and consistency:


Pan-Fried Meatloaf: Grandma’s Trick for Perfect Results

Pan-fried meatloaf is a simple and delicious main course, perfect for any occasion. Thanks to a grandmother’s trick, you can enjoy tender, juicy meat without using the oven. Discover the step-by-step recipe and serve an irresistible meatloaf!

Ingredients (Serves 4)

  • 500 g mixed minced meat (beef and pork)

  • 2 slices of stale bread

  • 100 ml milk

  • 1 egg

  • 50 g grated Parmesan cheese

  • 1 clove garlic, minced

  • Fresh parsley, chopped, to taste

  • Salt and pepper, to taste

  • Nutmeg, to taste

  • 100 g cooked ham (optional)

  • 100 g sliced cheese (optional, such as scamorza or provola)

  • Extra virgin olive oil, to taste

  • 1 glass of vegetable broth or water

Grandma’s Trick: Cooking in a Pan

The secret to a tender, flavorful meatloaf is slow cooking with the lid on, which keeps the meat juicy and prevents it from drying out. Another simple trick is soaking the bread in milk before adding it to the meat—this guarantees the perfect texture.

Preparation

  1. Prepare the mixture
    In a bowl, soak the stale bread in milk for a few minutes. Squeeze it well and crumble it into the minced meat.

  2. Add the remaining ingredients
    Add the egg, Parmesan, garlic, parsley, nutmeg, salt, and pepper. Mix thoroughly until smooth and well combined.

  3. Shape the meatloaf
    If desired, stuff the meatloaf with ham and cheese, rolling it carefully and sealing the edges well.

  4. Pan-fry
    Heat a drizzle of olive oil in a non-stick pan. Brown the meatloaf on all sides until evenly golden.

  5. Slow cooking with a lid
    Pour the vegetable broth into the pan, cover with a lid, and cook over low heat for 40–45 minutes, gently turning the meatloaf halfway through.

  6. Rest and serve
    Let the meatloaf rest for a few minutes before slicing and serving hot.

Tips for a Perfect Meatloaf

  • For a more flavorful crust, deglaze the pan with a splash of white wine before adding the broth.

  • Add vegetables such as carrots or onions to the pan for a richer flavor base.

  • For a lighter version, use only turkey or chicken mince.

Thanks to this grandmother’s trick, pan-fried meatloaf turns out tender and delicious—no oven required. Perfect for a family lunch or a cozy dinner, this easy recipe is sure to please everyone at the table!


If you want, I can also:

  • Make it more blog-style or SEO-friendly

  • Adapt it for American or British English

  • Shorten it for social media or a recipe card 🍽️

Vous avez dit :
The recipe for French dessert with milk and honey: simple and light A French dessert made with milk and honey is a perfect option for those seeking a light, healthy, and simple dessert. This recipe combines the delicate flavor of honey with the creaminess of milk, offering a satisfying, yet satisfying result. Let’s see how to make it step by step. Ingredients (for 4 servings) 500 ml of skimmed or semi-skimmed milk 2 whole eggs 50 g of honey (choose your favorite, such as wildflower or acacia) 30 g of corn starch 1 teaspoon vanilla extract A pinch of salt Cinnamon or dried fruit (optional) for decoration Preparation Prepare the creamy base: In a bowl, whisk the eggs and honey until smooth. Add the cornstarch and stir to eliminate any lumps. Heat the milk : Pour the milk into a saucepan and heat it over medium-low heat with the vanilla extract, without bringing it to a boil. Combine the mixtures : Slowly add the warm milk to the egg and honey mixture, stirring constantly to prevent the eggs from curdling. Cook the cream : Return everything to the saucepan and cook over low heat, stirring constantly with a whisk. After a few minutes, the cream will begin to thicken. Pour into molds : Once ready, divide the cream into cups or ramekins. Let cool to room temperature and then refrigerate for at least 2 hours. How to serve You can garnish the dessert with a dusting of cinnamon, flaked almonds, or chopped hazelnuts for added crunch. It’s also delicious served with a drizzle of extra honey or a few slices of fresh fruit. Correct text
ChatGPT a dit :

Here’s a corrected and polished version of your text, with improved grammar, clarity, and flow while keeping the original meaning and tone intact:


French Milk and Honey Dessert: Simple and Light

A French dessert made with milk and honey is a perfect option for anyone looking for a light, healthy, and easy-to-make treat. This recipe combines the delicate sweetness of honey with the creaminess of milk, resulting in a dessert that is satisfying yet light. Let’s see how to prepare it step by step.

Ingredients (Serves 4)

  • 500 ml skimmed or semi-skimmed milk

  • 2 whole eggs

  • 50 g honey (choose your favorite, such as wildflower or acacia)

  • 30 g cornstarch

  • 1 teaspoon vanilla extract

  • A pinch of salt

  • Cinnamon or dried fruit (optional), for garnish

Preparation

  1. Prepare the creamy base
    In a bowl, whisk the eggs and honey until smooth. Add the cornstarch and mix well to remove any lumps.

  2. Heat the milk
    Pour the milk into a saucepan and heat it over medium-low heat with the vanilla extract, without letting it boil.

  3. Combine the mixtures
    Slowly pour the warm milk into the egg and honey mixture, stirring constantly to prevent the eggs from curdling.

  4. Cook the cream
    Transfer everything back into the saucepan and cook over low heat, stirring continuously with a whisk. After a few minutes, the cream will begin to thicken.

  5. Pour into molds
    Once the cream is ready, divide it into cups or ramekins. Let it cool to room temperature, then refrigerate for at least 2 hours.

How to Serve

Garnish with a light dusting of cinnamon, flaked almonds, or chopped hazelnuts for extra texture. It’s also delicious topped with a drizzle of honey or served with a few slices of fresh fruit.


If you’d like, I can also:

  • Simplify it further

  • Adapt it for a blog post or recipe card

  • Rewrite it in a more elegant or more casual tone 🍯🥛

    Continued on the next page

    Read more

Chia Challenge: A light diet for rapid weight loss – up to 6 kg in 14 days!

Introduction
If you’re looking for a natural way to lose weight while also taking care of your health, a chia seed diet could be the perfect solution. These unassuming seeds are a true superfood – rich in fiber, protein, healthy fats, and antioxidants. Combined with a light diet and proper hydration, they can help you lose up to 6 kg in two weeks. Check out our chia recipe and learn how to get the most out of it!

Ingredients:
For one serving of chia pudding (base recipe):

3 tablespoons chia seeds

200 ml plant-based milk (e.g., almond, coconut, or oat)

1 teaspoon honey or maple syrup (optional)

½ teaspoon cinnamon

A handful of fresh fruit (e.g., blueberries, raspberries, kiwi, or banana)

Preparation:

In a bowl or jar, combine the plant-based milk and chia seeds.

Add cinnamon and optional honey for a delicate sweetness.

Leave the mixture for at least 15 minutes (preferably overnight in the refrigerator) to allow the seeds to swell and form a pudding-like consistency.

Garnish with your favorite fruit before serving.

See more on the next page. Serving and Storage Tips:
The finished pudding can be stored in the refrigerator for up to 3 days. It’s best to prepare a larger batch in the evening and have it ready for breakfast or a snack for several days. Serve chilled, topped with fresh fruit, nuts, or coconut flakes.

Variations:
With cocoa: Add 1 tablespoon of raw cocoa to the mixture for a chocolate version.

With matcha: A teaspoon of matcha will enrich the pudding with additional antioxidants.

With yogurt: Use plain yogurt instead of milk for a creamier consistency.

With fruit puree: Layer with mango, raspberry, or strawberry puree for a dessert effect.

1. Can you really lose 6 kg in 2 weeks on the chia diet?

Continued on the next page

Read more

You Must Pick Only One Beach House To Live In For The Rest Of Your Life: Your Answer Reveals Everything About You

Imagine this simple but powerful scenario: you are allowed to choose only one beach house to live in for the rest of your life. No upgrades, no switching later, no second homes. Just one place, one view, one rhythm of life.

At first, it sounds like a fun fantasy. But the truth is, the house you’re drawn to says a lot about your inner world—your values, your emotional needs, and how you see happiness.

Take a moment. Look at the six beach houses. Don’t overthink it. Which one feels like home to you?

Now, let’s explore what your choice might reveal.

🏝️ House 1: The Cozy Tropical Hut

If you chose House 1, you are someone who values simplicity, warmth, and emotional safety. You don’t need luxury to feel fulfilled. What matters to you is peace, connection, and feeling grounded.

You likely enjoy slow mornings, deep conversations, and a life that feels human rather than impressive. You may be nostalgic by nature and find joy in small, meaningful routines. For you, happiness is quiet—not loud.

🏖️ House 2: The Minimalist Modern Retreat

Choosing House 2 suggests you crave clarity, control, and mental space. You appreciate clean lines, open areas, and a sense of order—both in your surroundings and in your thoughts.

You are likely analytical, independent, and forward-thinking. Emotional drama drains you, and you feel most at ease when life is efficient and intentional. You believe less clutter creates more freedom, and you design your life carefully rather than impulsively.

🌊 House 3: The Classic Beachfront Home

Continued on the next page

Read more

This Simple Homemade Jam Recipe: Turning Fresh Fruit into Golden Comfort

There’s something deeply satisfying about making jam at home. It’s not just about preserving fruit—it’s about capturing flavor, season, and simplicity in a single jar. The image above shows ripe, golden stone fruits with large pits and juicy flesh, often used in traditional homemade jams. Fruits like these are naturally sweet, fragrant, and perfect for a simple, no-fuss jam recipe that doesn’t rely on artificial additives or complicated steps.

This recipe is ideal for beginners and anyone who loves old-fashioned, homemade goodness.

Why Homemade Jam Is Always Better
Homemade jam stands apart because:

You control the ingredients

There are no preservatives or artificial colors

The fruit flavor is fresh and authentic

It can be adjusted to your preferred sweetness

Golden fruits like these break down beautifully when cooked, creating a smooth, glossy jam with a naturally rich color.

Ingredients You’ll Need
This recipe keeps things minimal:

1 kg (about 2 lbs) ripe fresh fruit (pitted and cleaned)

500–700 g sugar (adjust to taste)

Juice of 1 lemon

½ cup water

Continued on the next page

Read more

Learn the Easiest and Hassle-Free Way to Cook Bacon

Cooking bacon can be messy and time-consuming, but there’s a simple method that delivers perfectly crispy, evenly cooked bacon with minimal effort — and no splattering mess.

Why You’ll Love This Method

  • No Mess – Keeps your stovetop and counters clean.

  • Hands-Off Cooking – Minimal monitoring required.

  • Perfectly Cooked – Even crispiness from edge to edge.

  • Versatile – Works for small or large batches.

  • Customizable – Adjust cooking time for chewy or extra-crispy bacon.

The Easiest Way to Cook Bacon: Oven-Baked Method

The oven-baked method is efficient, consistent, and ideal for cooking bacon without the mess of stovetop frying.

Ingredients & Tools

  • Bacon slices

  • Rimmed baking sheet

  • Aluminum foil or parchment paper (optional, for easy cleanup)

  • Wire cooling rack (optional, for extra crispiness)

Instructions

Continued on the next page

Read more

Please STOP Boiling Potatoes in Water!

Let’s have an honest kitchen talk.
You love potatoes.
I love potatoes.
We all love potatoes.
But if you’re still boiling them in a big pot of plain water…
I hate to say it:
You’re stealing flavor, wasting nutrients, and committing culinary treason against one of the world’s most humble, glorious vegetables. 😱
Yes, boiling is classic. It’s easy. It’s what Grandma did.
But guess what?
That pot of bubbling water isn’t cooking your potatoes—it’s leaching them.
Flavor? Leaked out.
Nutrients? Floating in the broth you pour down the drain.
Texture? Mushy, waterlogged, sad.
So let’s break up with boring boiled potatoes—for good—and discover ways to cook them that make them taste like they were meant to: rich, creamy, deeply savory, and full of soul.
❌ Why Boiling Potatoes in Water Is Doing More Harm Than Good:

Why Boiling Potatoes in Water Is Doing More Harm Than Good

It’s not just “meh.” It’s scientifically underwhelming.

1. Flavor Gets Washed Away

Potatoes have natural sugars and delicious earthiness—but when submerged in water, those delicate flavors dilute fast. The result? Bland, neutral spuds that need a rescue mission of butter and salt.

2. They Absorb Too Much Water

Ever tried roasting boiled potatoes? They steam instead of crisp.

Why? Because they’re already soaked. All that extra moisture fights browning and gives you soggy fries or gluey mash.

3. Vitamins Go Down the Drain

Water-soluble vitamins like vitamin C and B-complex don’t stay put—they escape into the cooking water. And unless you’re drinking that starchy liquid (soup, anyone?), you’re tossing away nutrition.

4. It Wastes Energy & Time

Boiling a large pot of water takes forever. And for what? A soft potato that could’ve been ready faster, tastier, and smarter.

👉 Bottom line: Boiling isn’t wrong—it’s just not the best tool for most jobs.

✅ The Better Ways to Cook Potatoes (No Water Required!)

Say goodbye to soggy spuds and hello to flavor-packed perfection. Try these smarter, tastier methods:

🥄 1. Steam Them – The Gentle Giant

Why it wins: No submersion = no flavor loss. Just tender, clean-tasting potatoes ready for anything.

How to do it:

Cut into even chunks (or leave small ones whole).

Place in a steamer basket over simmering water.

Cover and steam 15–20 minutes, until fork-tender.

✅ Perfect for: Mashed potatoes, potato salad, casseroles

🔥 Bonus: You can season after steaming without worrying about oversalting.

⏱️ 2. Microwave Whole Potatoes – Fast & Fluffy

Why it wins: Speed + texture. Microwaving locks in moisture and cooks from the inside out.

How to do it:

Wash and pierce skin with a fork (to prevent explosions—yes, really).

Microwave on high 5–8 minutes, flipping halfway.

Finish in oven for 10 mins if you want crispy skin.

✅ Perfect for: Baked potatoes, smashed potatoes, quick weeknight sides

💡 Pro tip: Wrap in a damp paper towel for extra fluffiness.

🔥 3. Roast Them – Flavor Explosion Mode

Why it wins: High heat = caramelization = deep, nutty, golden deliciousness.

How to do it:

[object NodeList][object NodeList]

Continued on the next page

Read more